Deploying a React + Node.js Application with Docker
Recently, I spent time working on an e-commerce application built with TypeScript, React.js, Node.js and GraphQL. And in this following article, I will outline how I built, containerized and deployed this web application. The code for this project is available here.
So first off. What is Docker?
Docker containers are a lightweight, self-contained virtual machines that package an application and its dependencies together. They provide a consistent and isolated environment for running applications, regardless of the underlying operation system or infrastructure.
Imagine you have a recipe for baking a cake. The recipe lists all the ingredients and instructions needed to make the cake. In this analogy, the recipe is like your application code, and the ingredients are like the dependencies required to run your application.
If you want to bake the cake in different kitchens or share it with others, you would need to package the recipe and ingredients together. This way anyone can reproduce the cake exactly as you intended, regardless of their kitchen setup.
Docker containers work similarly. They allow you to package your application code and all its dependencies into a single container. This container can then be run on any system that has Docker installed. It provides a consistent environment, ensuring that your application runs the same way across different machines or servers.
Important things to know
Dockerfile: A Dockerfile is the blueprint for building a docker image
Images: A docker image is a template for running docker containers
Containers: A docker container is a running process. In our case, it is the Capture e-commerce application.
Containerization with Docker
After development was completed, I decided to containerize the app with Docker. In order to do this, I created Dockerfiles for both the client-side and server-side and then used docker-compose to aggregate the two Dockerfiles and deploy the containers on the same network. For the client-side, the Dockerfile looks like this:
# Use official Node.js image as the base image
FROM node:lts-alpine

# Set the working directory inside the container
WORKDIR /app

# Copy package.json and package-lock.json to the working directory
COPY package*.json ./

# Install dependencies
RUN npm install

# Copy the entire client directory to the working directory
COPY . .

# Build the app
RUN npm run build

# Set the environment variable for the API endpoint
ENV REACT_APP_API_URL=http://localhost:4000

# Expose port 3000 to serve the app
EXPOSE 3000

# Start the server
CMD [ "npm", "start" ]
Overview of the commands
FROM: Defines the image we will use as the basis for our container. In this context, we are going to use the latest alpine Node version which is based on the popular Alpine Linux project.
WORKDIR: Sets the working directory for the application. If the working directory does not already exist, it will be created by Docker.
COPY: Copy a file or files in the Docker container. On this line, we list that we want to copy both package.json and package-lock.json to be copied over to the working directory (package*.json allows us to add package-lock.json).
RUN: Specifices a command that should be run by Docker. I used this command to install dependencies. In this context, we run npm install and after copying over the client directory to Docker’s working directory, I run npm run build
ENV: Sometimes you have environment variables set on the client side and you want the Docker container to utilize those variables. In this context, we want use the server URL as the API URL (this could be modified to a deployed URL e.g. Amazon EC2)
EXPOSE: Tells Docker which ports the container should listen on during runtime. In this context, we expost port 3000 since that is the port our app is running on.
CMD: Specifies the command that should be executed when the docker container starts. In this context, we run npm start since that is the command to start the front-end.
Similarly, we repeat this process for the backend. Below is the Dockerfile for the server API:
# Use official Node.js image as the base image
FROM node:lts-alpine

# Set the working directory inside the container
WORKDIR /app

# Copy package.json and package-lock.json to the working directory
COPY package*.json ./

# Install dependencies
RUN npm install

# Copy the entire server directory to the working directory
COPY . .

# Set the environment variable for the server port
ENV PORT=4000

# Expose the server port
EXPOSE 4000

# Start the server
CMD ["npm", "start"]
Now that, we have our Dockerfiles for both the client-side and server-side, we can create the docker-compose.yml file in the root of our project directory. Here is what his file looks like:
version: "3"
services:
  client:
    container_name: 'shop-capture-client'
    image: 'francisngo/shop-capture-client'
    build:
      context: ./client
      dockerfile: ./Dockerfile
    ports:
      - 3000:3000
    environment:
      - REACT_APP_API_URL=http://server:4000
  server:
    container_name: 'shop-capture-server'
    image: 'francisngo/shop-capture-server'
    build:
      context: ./server
      dockerfile: ./Dockerfile
    ports:
      - 4000:4000
We define the names of the services that make up our application: client and server. Then, within each of these services, we provide the build context, the path to the build context’s Dockerfile, the name for the Docker image, and the necessary port mappings.
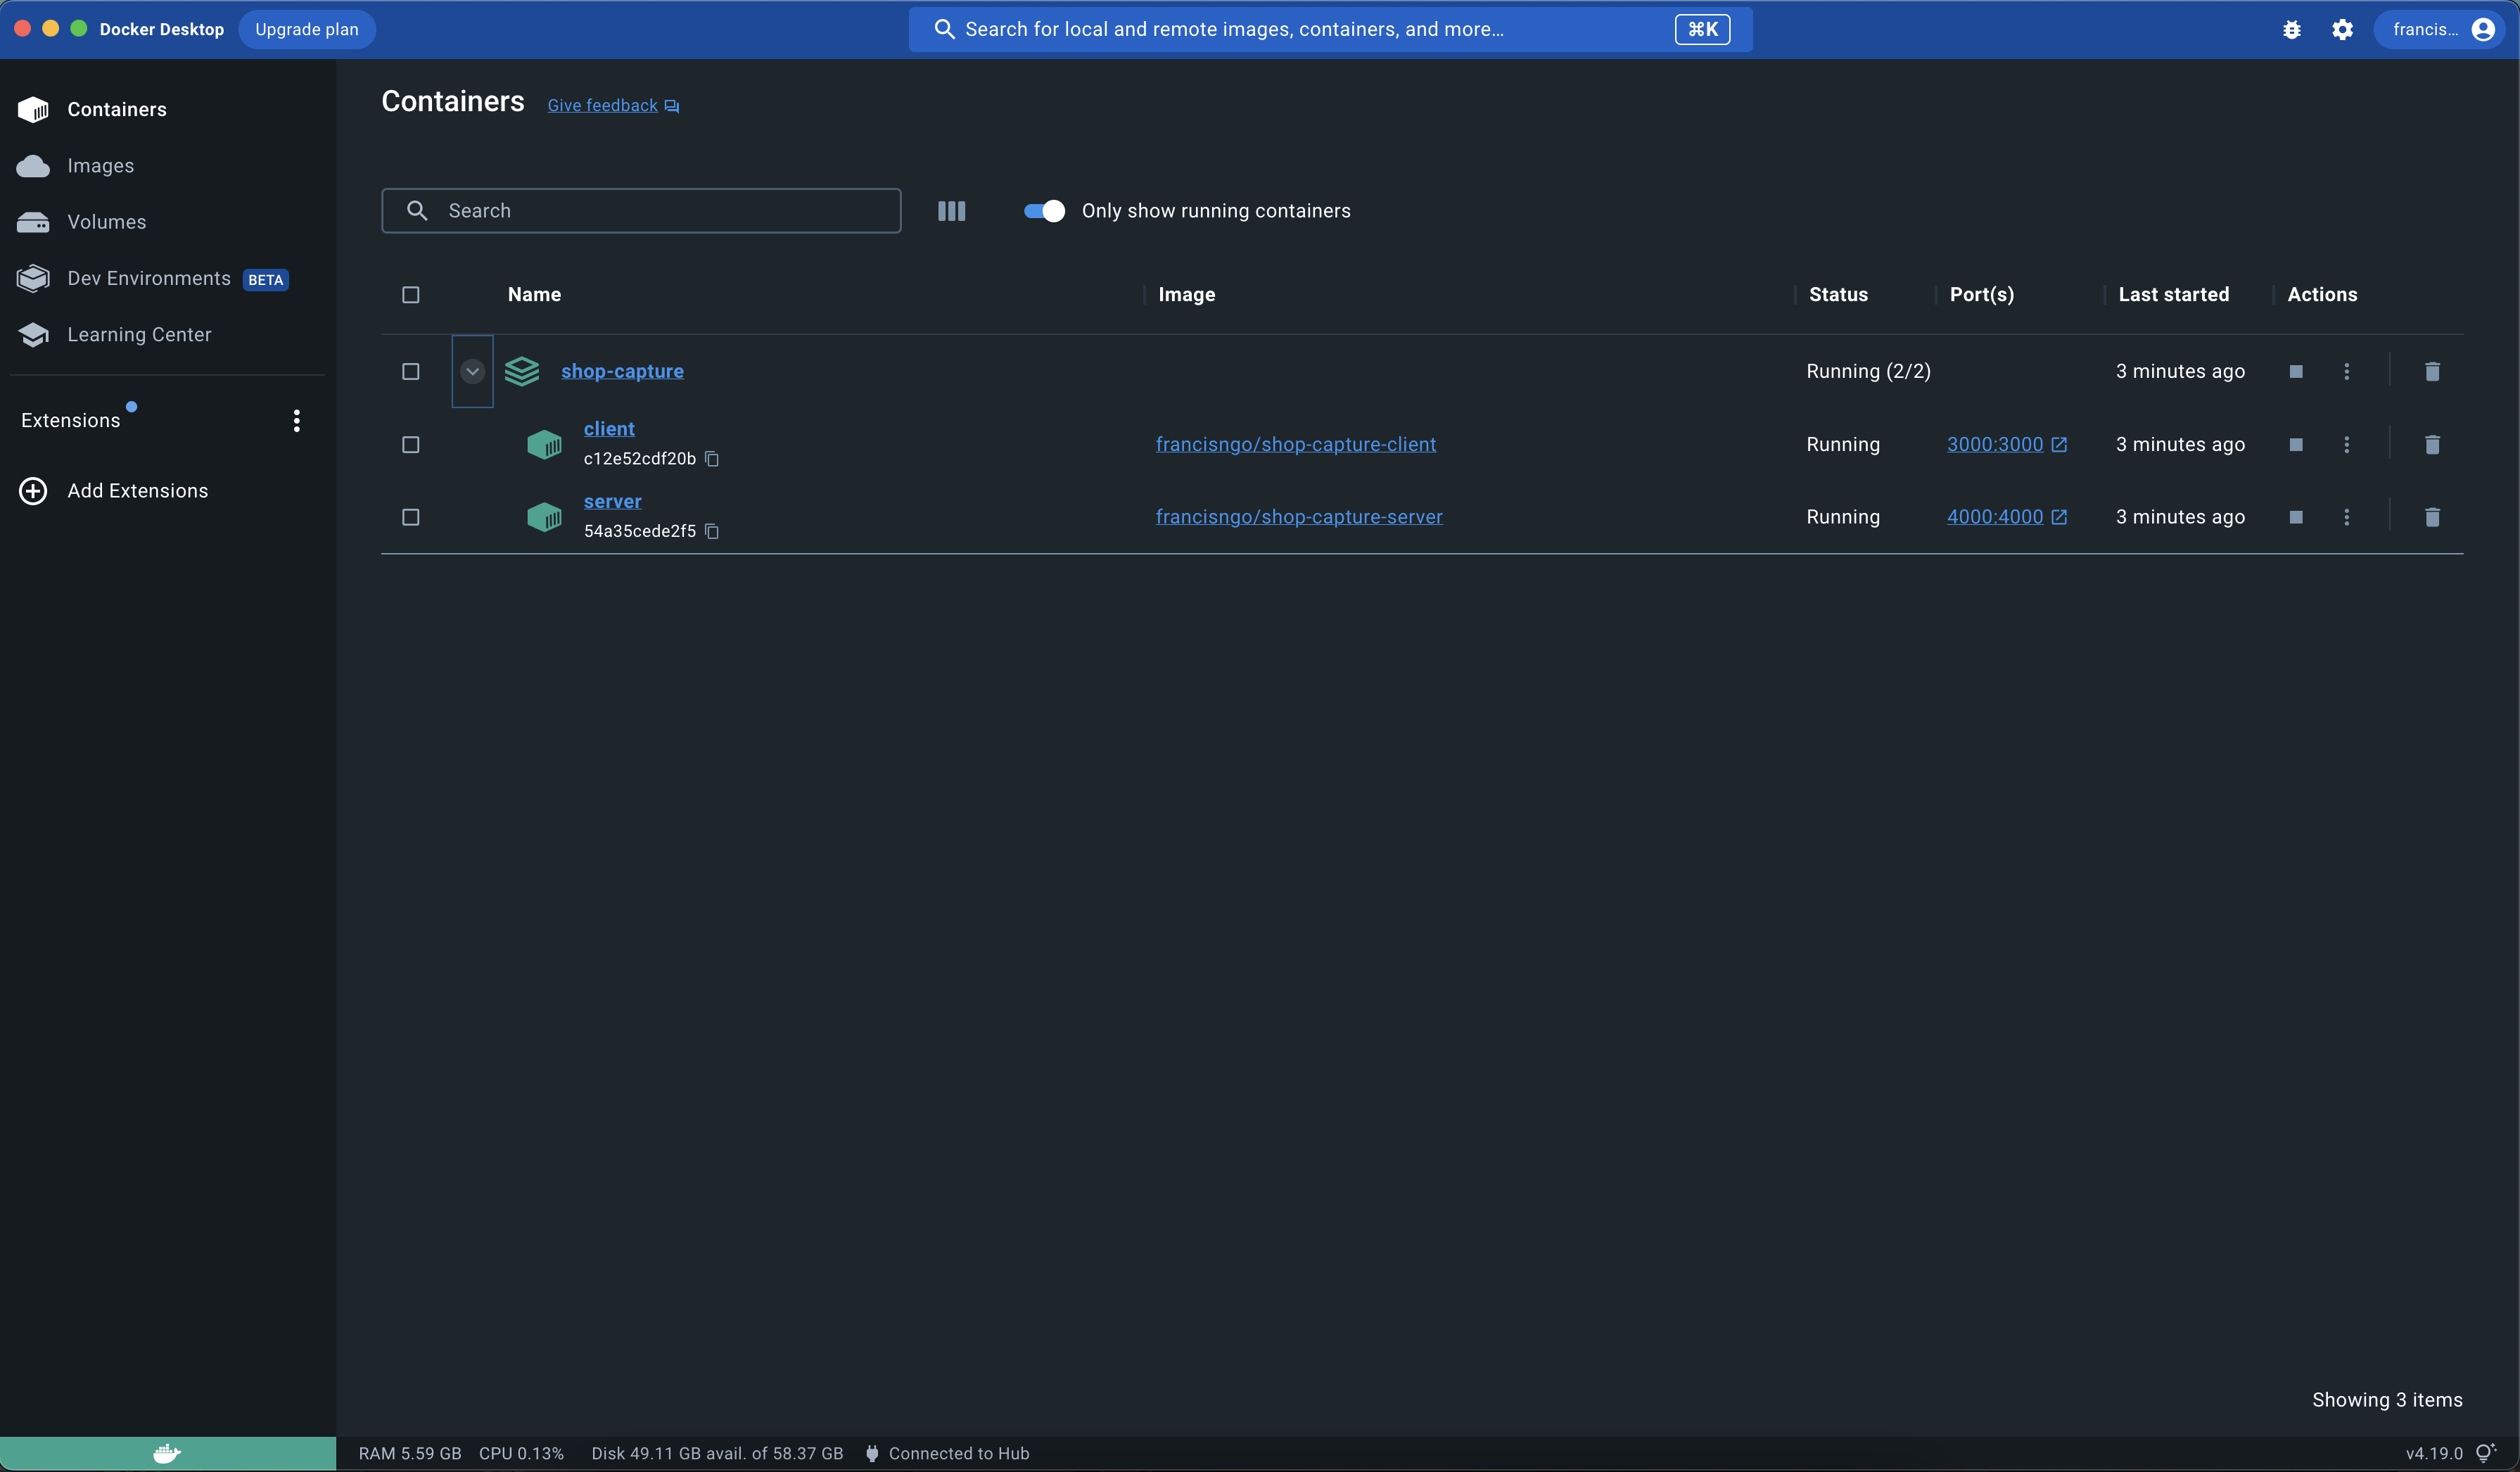
For the next step, we will need to have Docker Desktop and a Docker Hub account. To test our application locally, in the shell terminal, we can run:
docker compose up --build
If everything goes well, we should see our container on the Docker desktop.
Deployment
Now, since we have developed and containerized our application, the next step is deployment. There are many ways to deploy a dockerized application. For this instance, we will use an AWS EC2 instance.
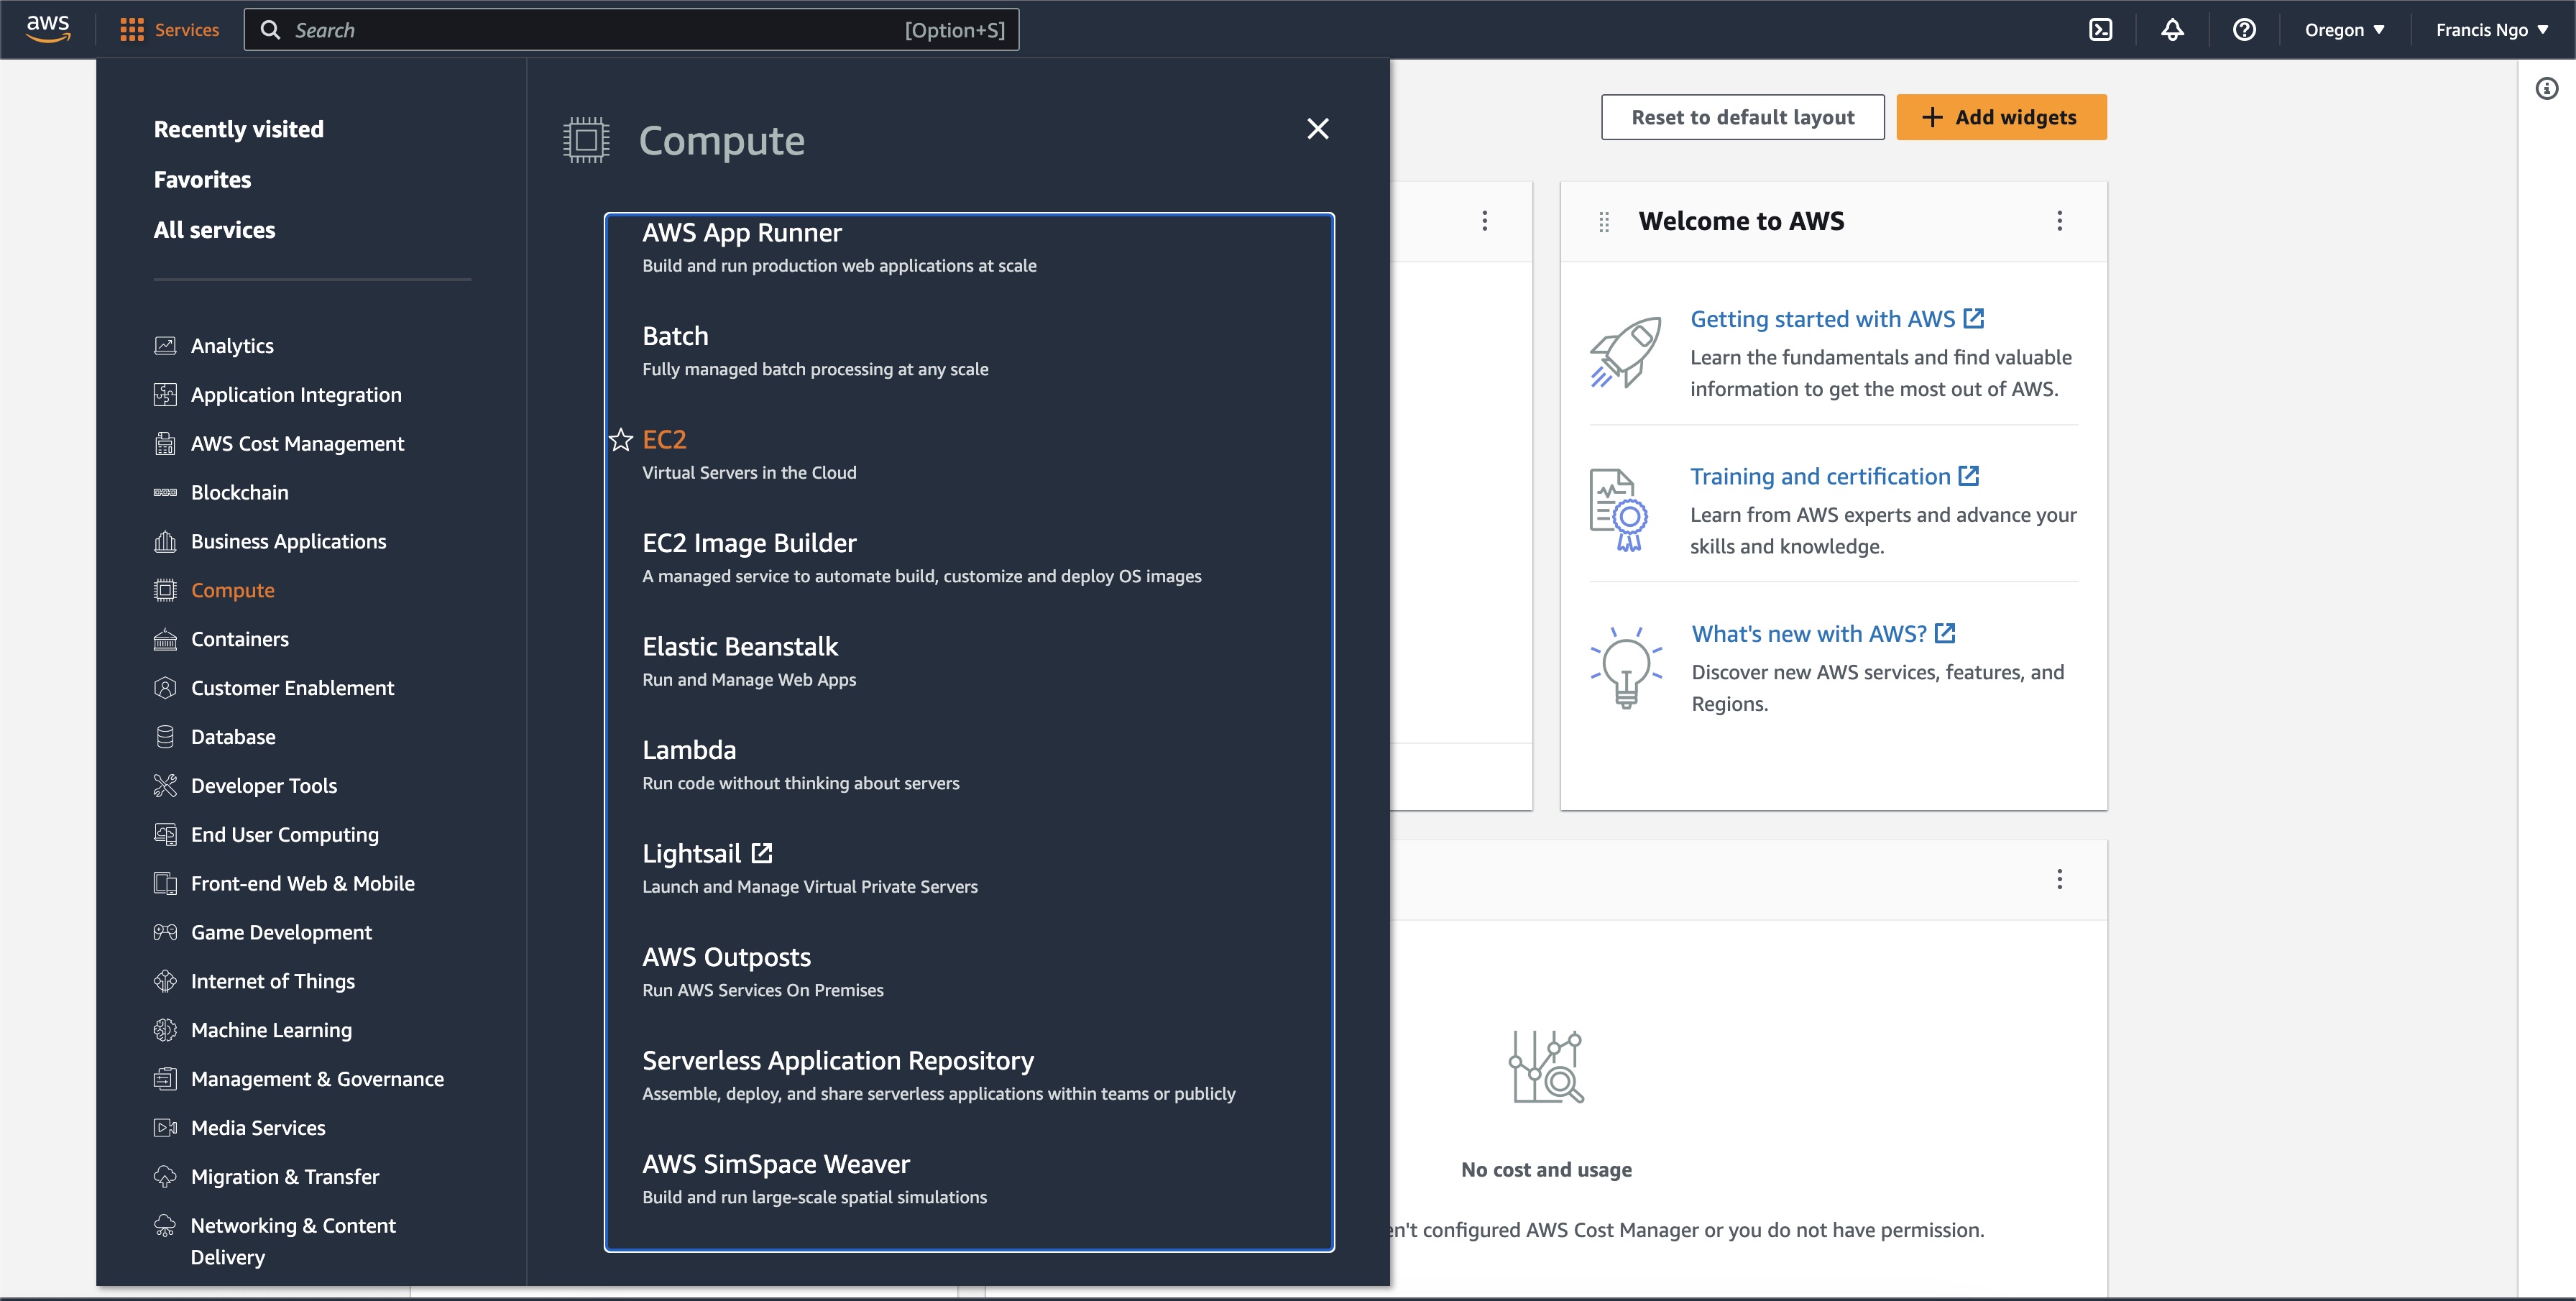
Go to aws.amazon.com and select EC2 from the top menu under Compute.
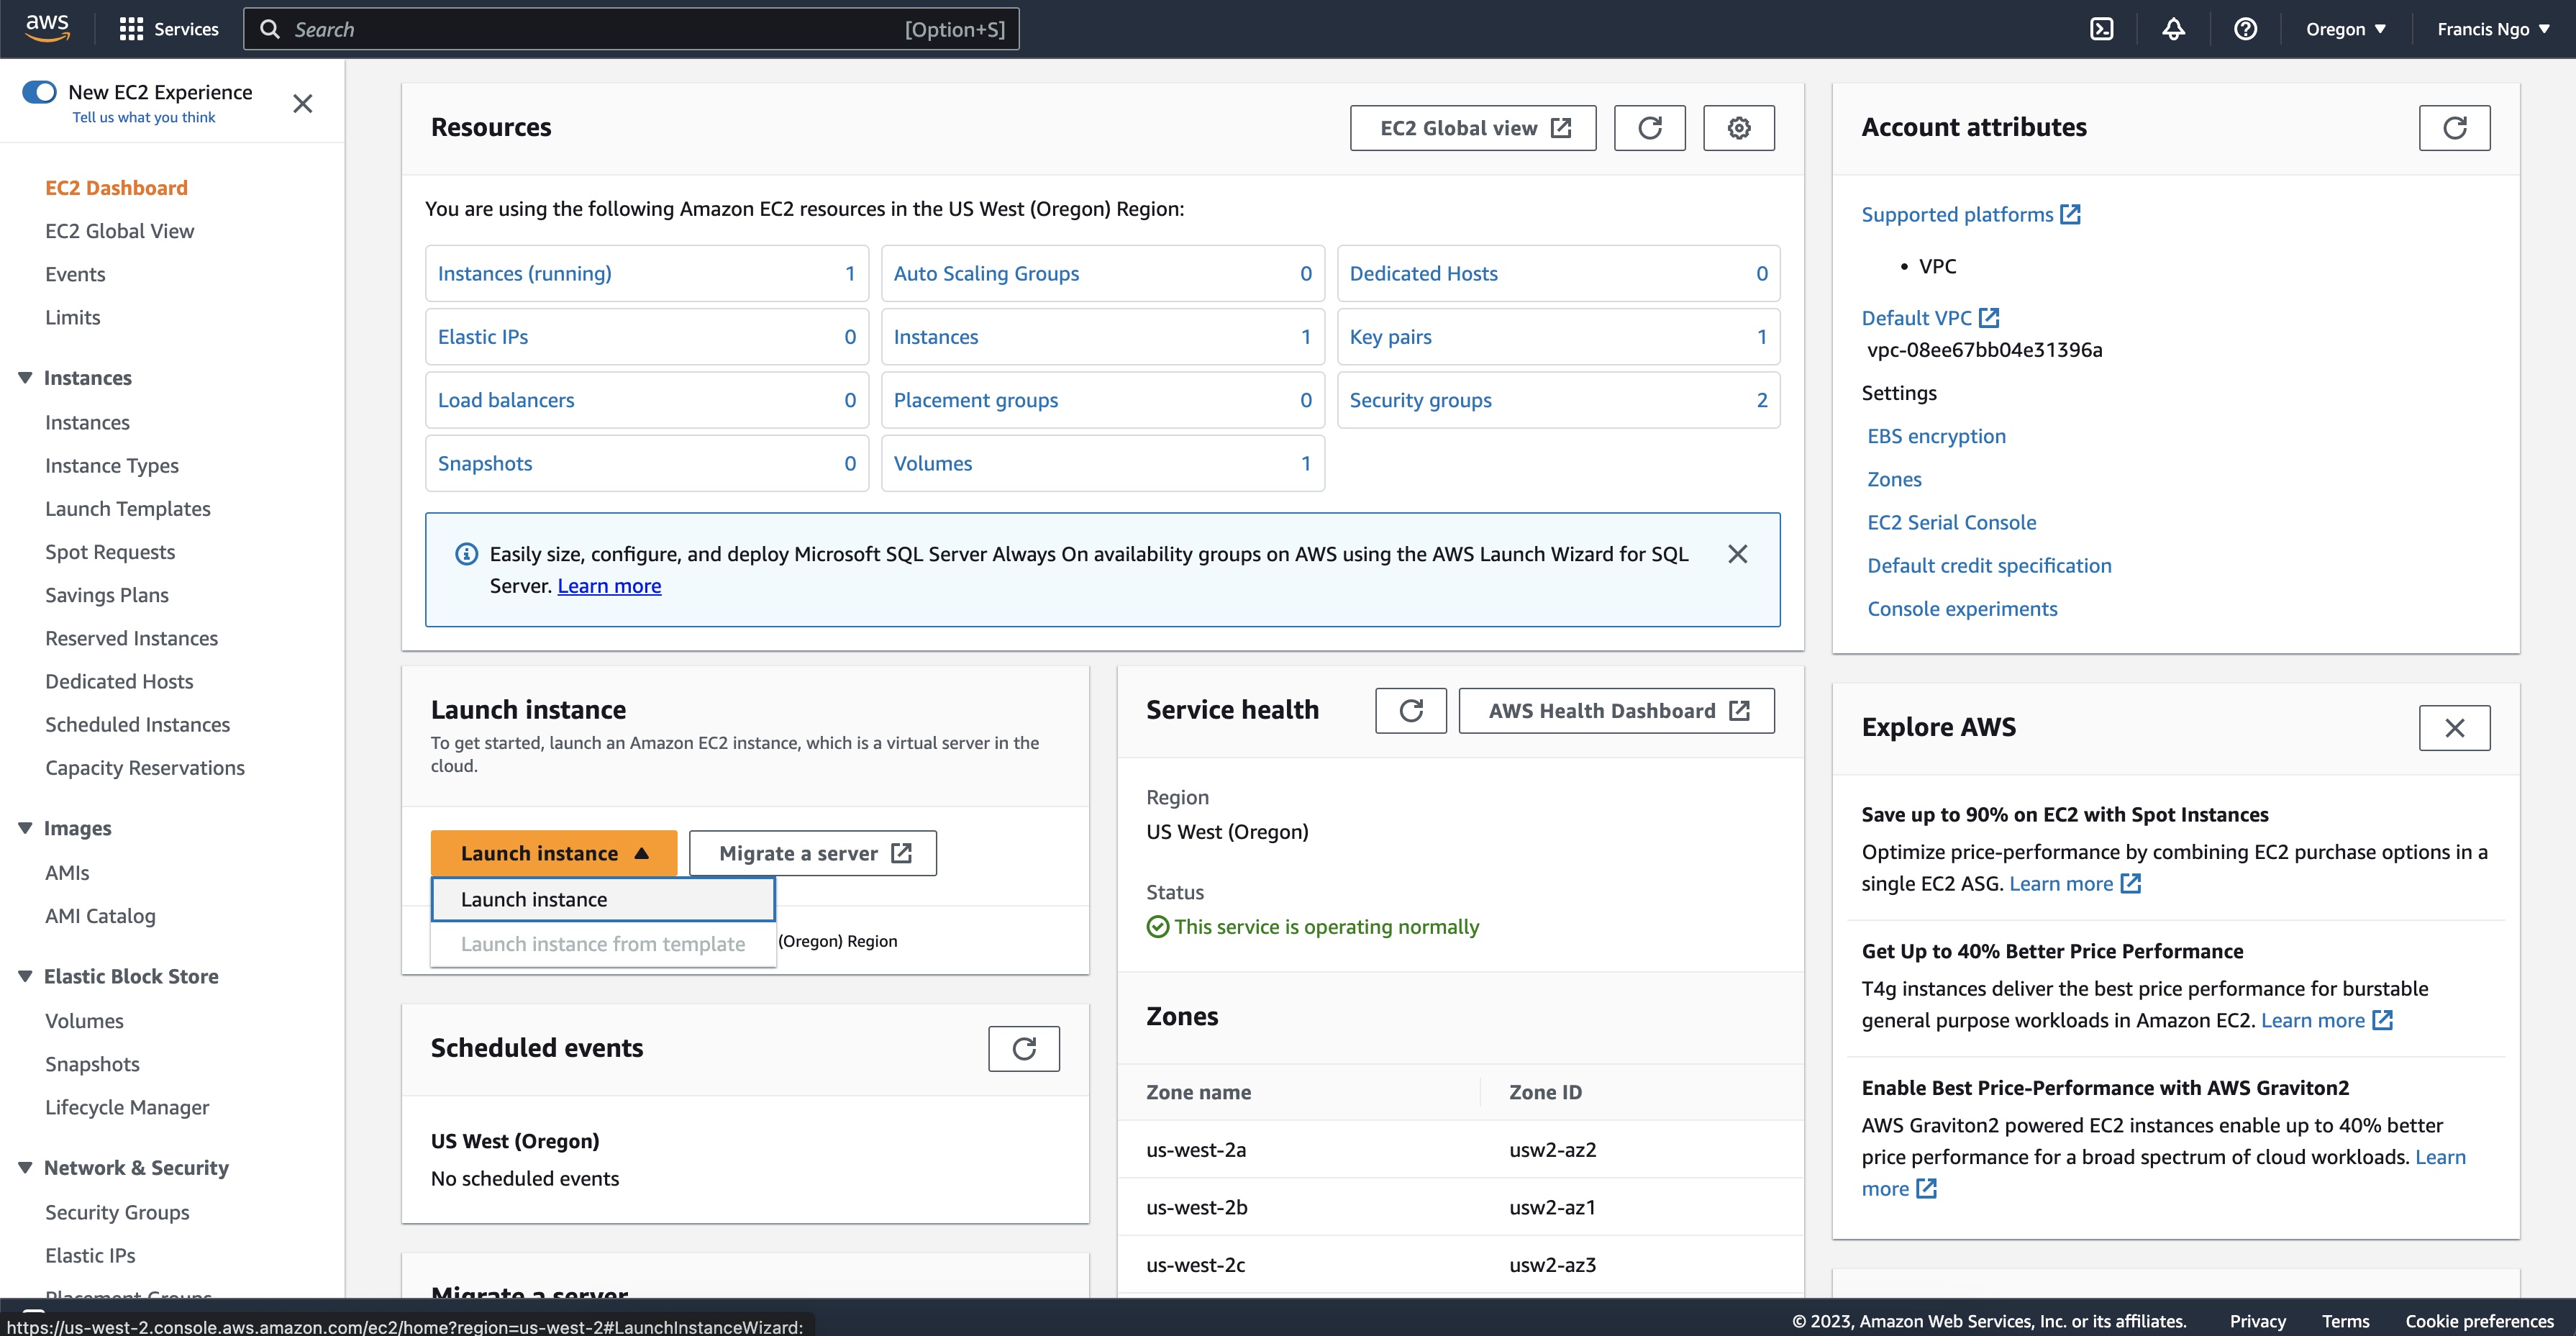
Under the EC2 page, we will select Launch Instance.
For our instance, we are going to stick with the free tier since it will likely only be for demo purposes.
We will select the Amazon Linux 2023 AMI 64-bit (x86) under Application and Os Images (Amazon Machine Image).
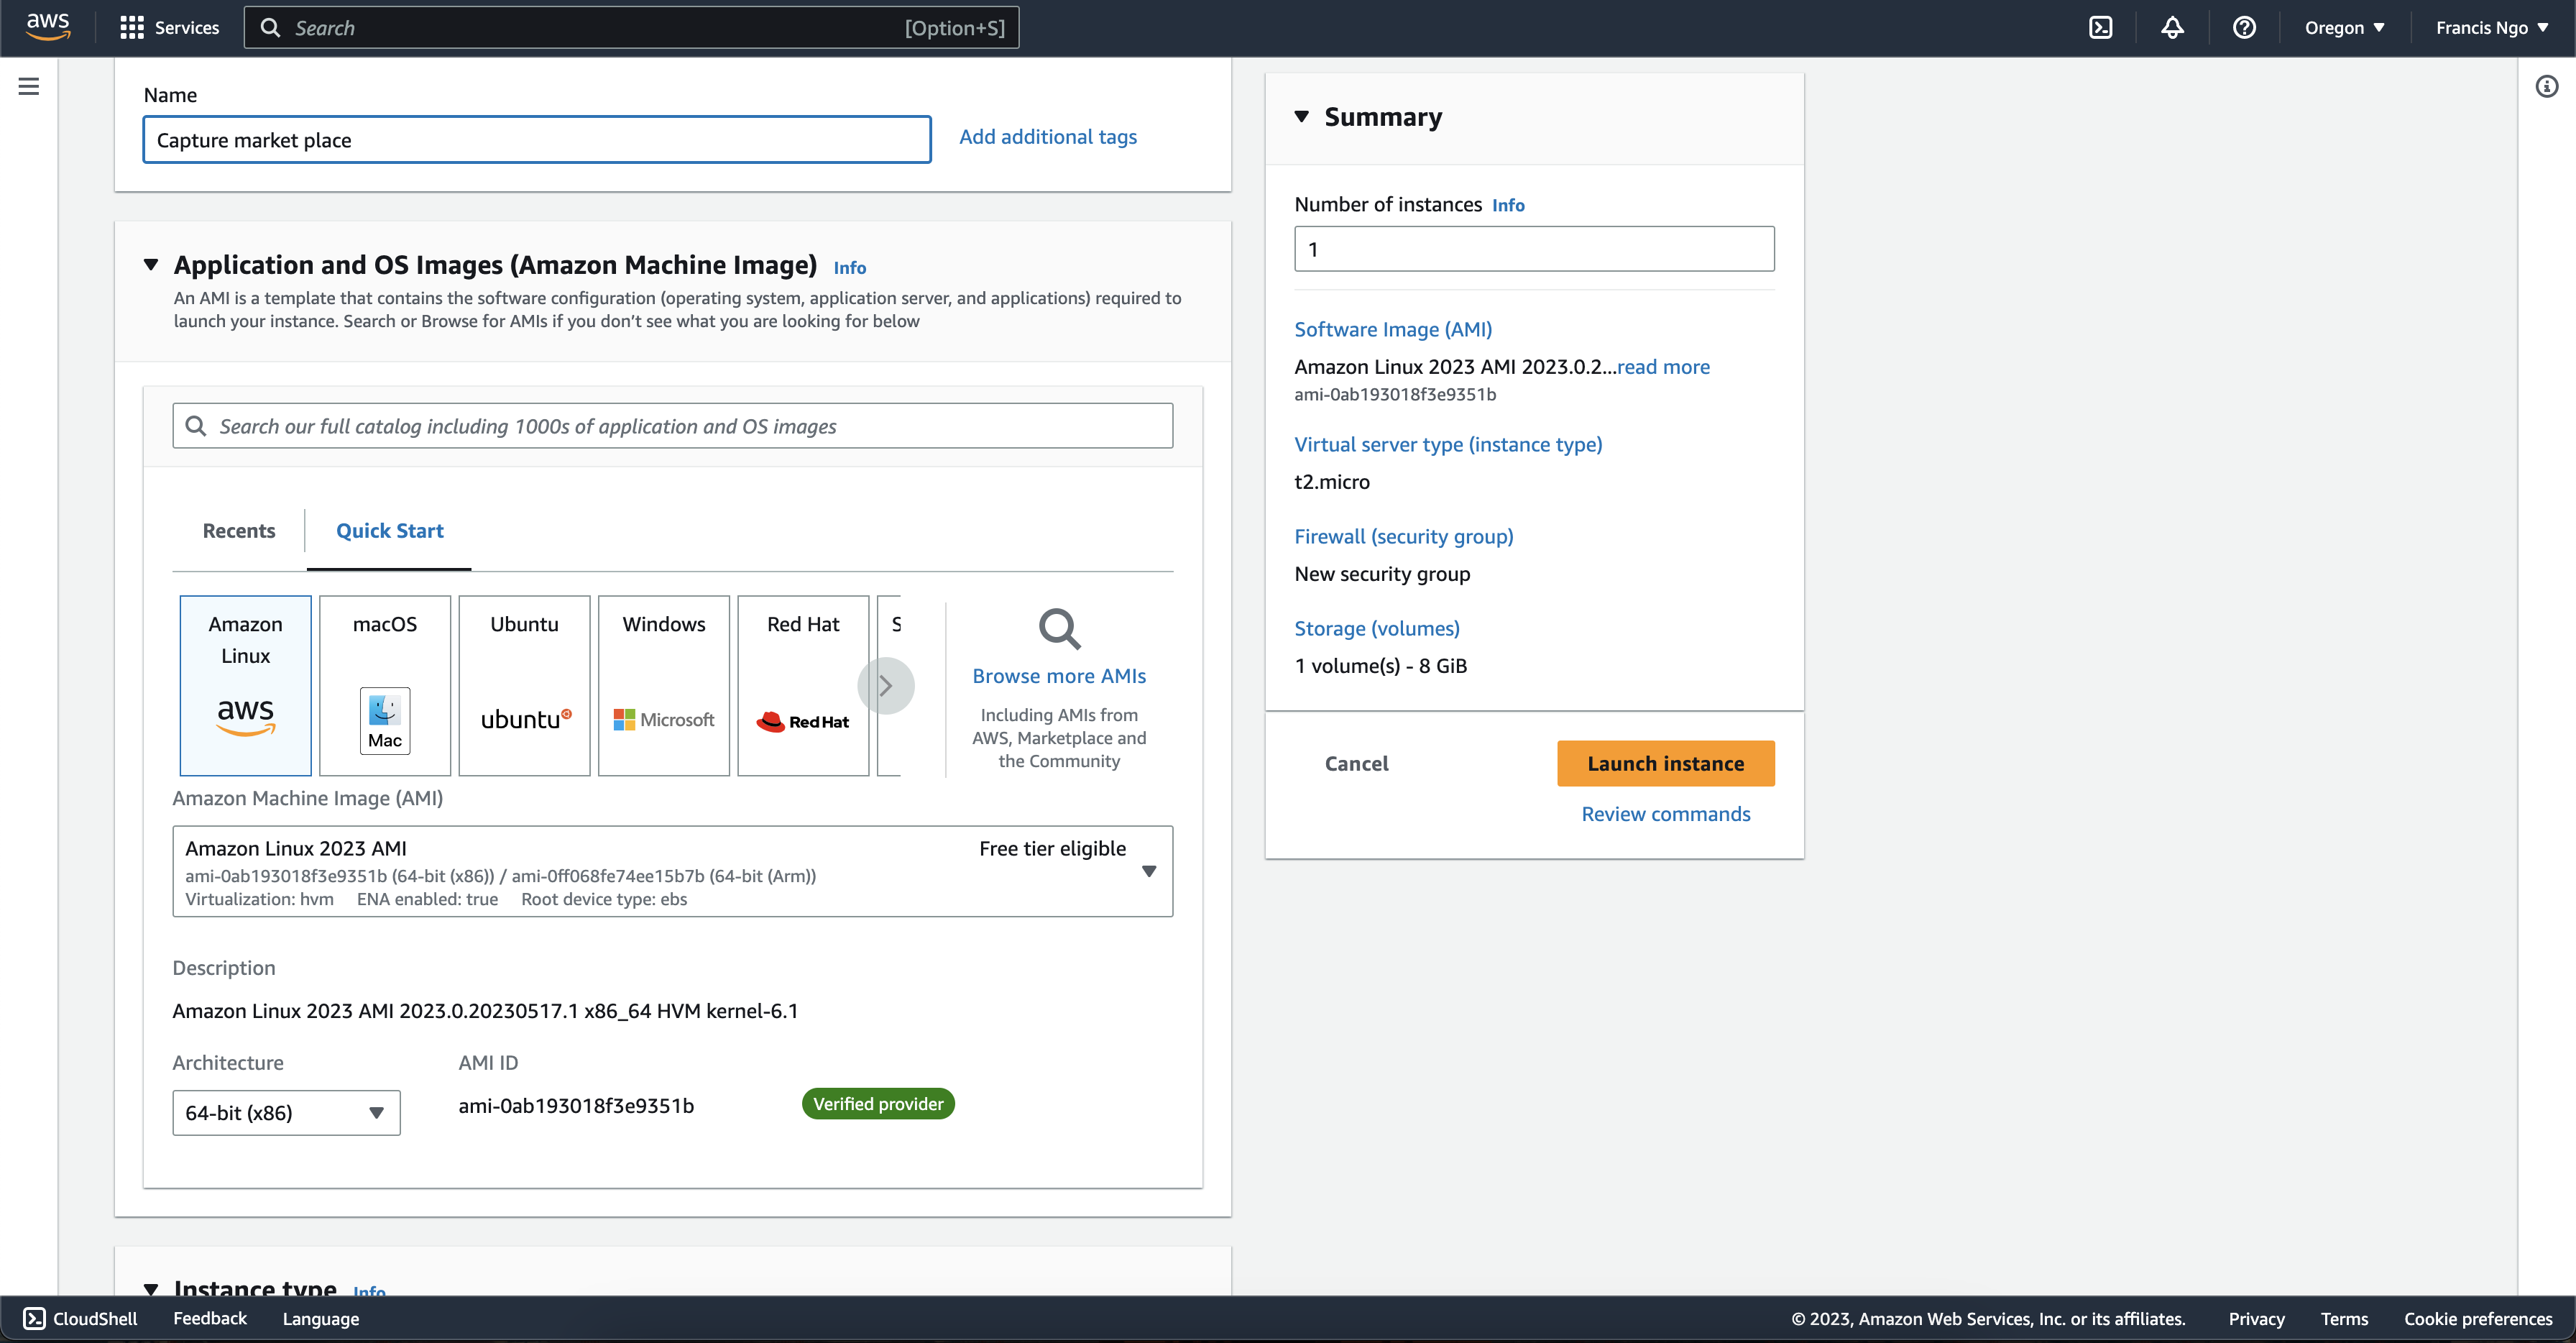
The instance type will be t2.micro.
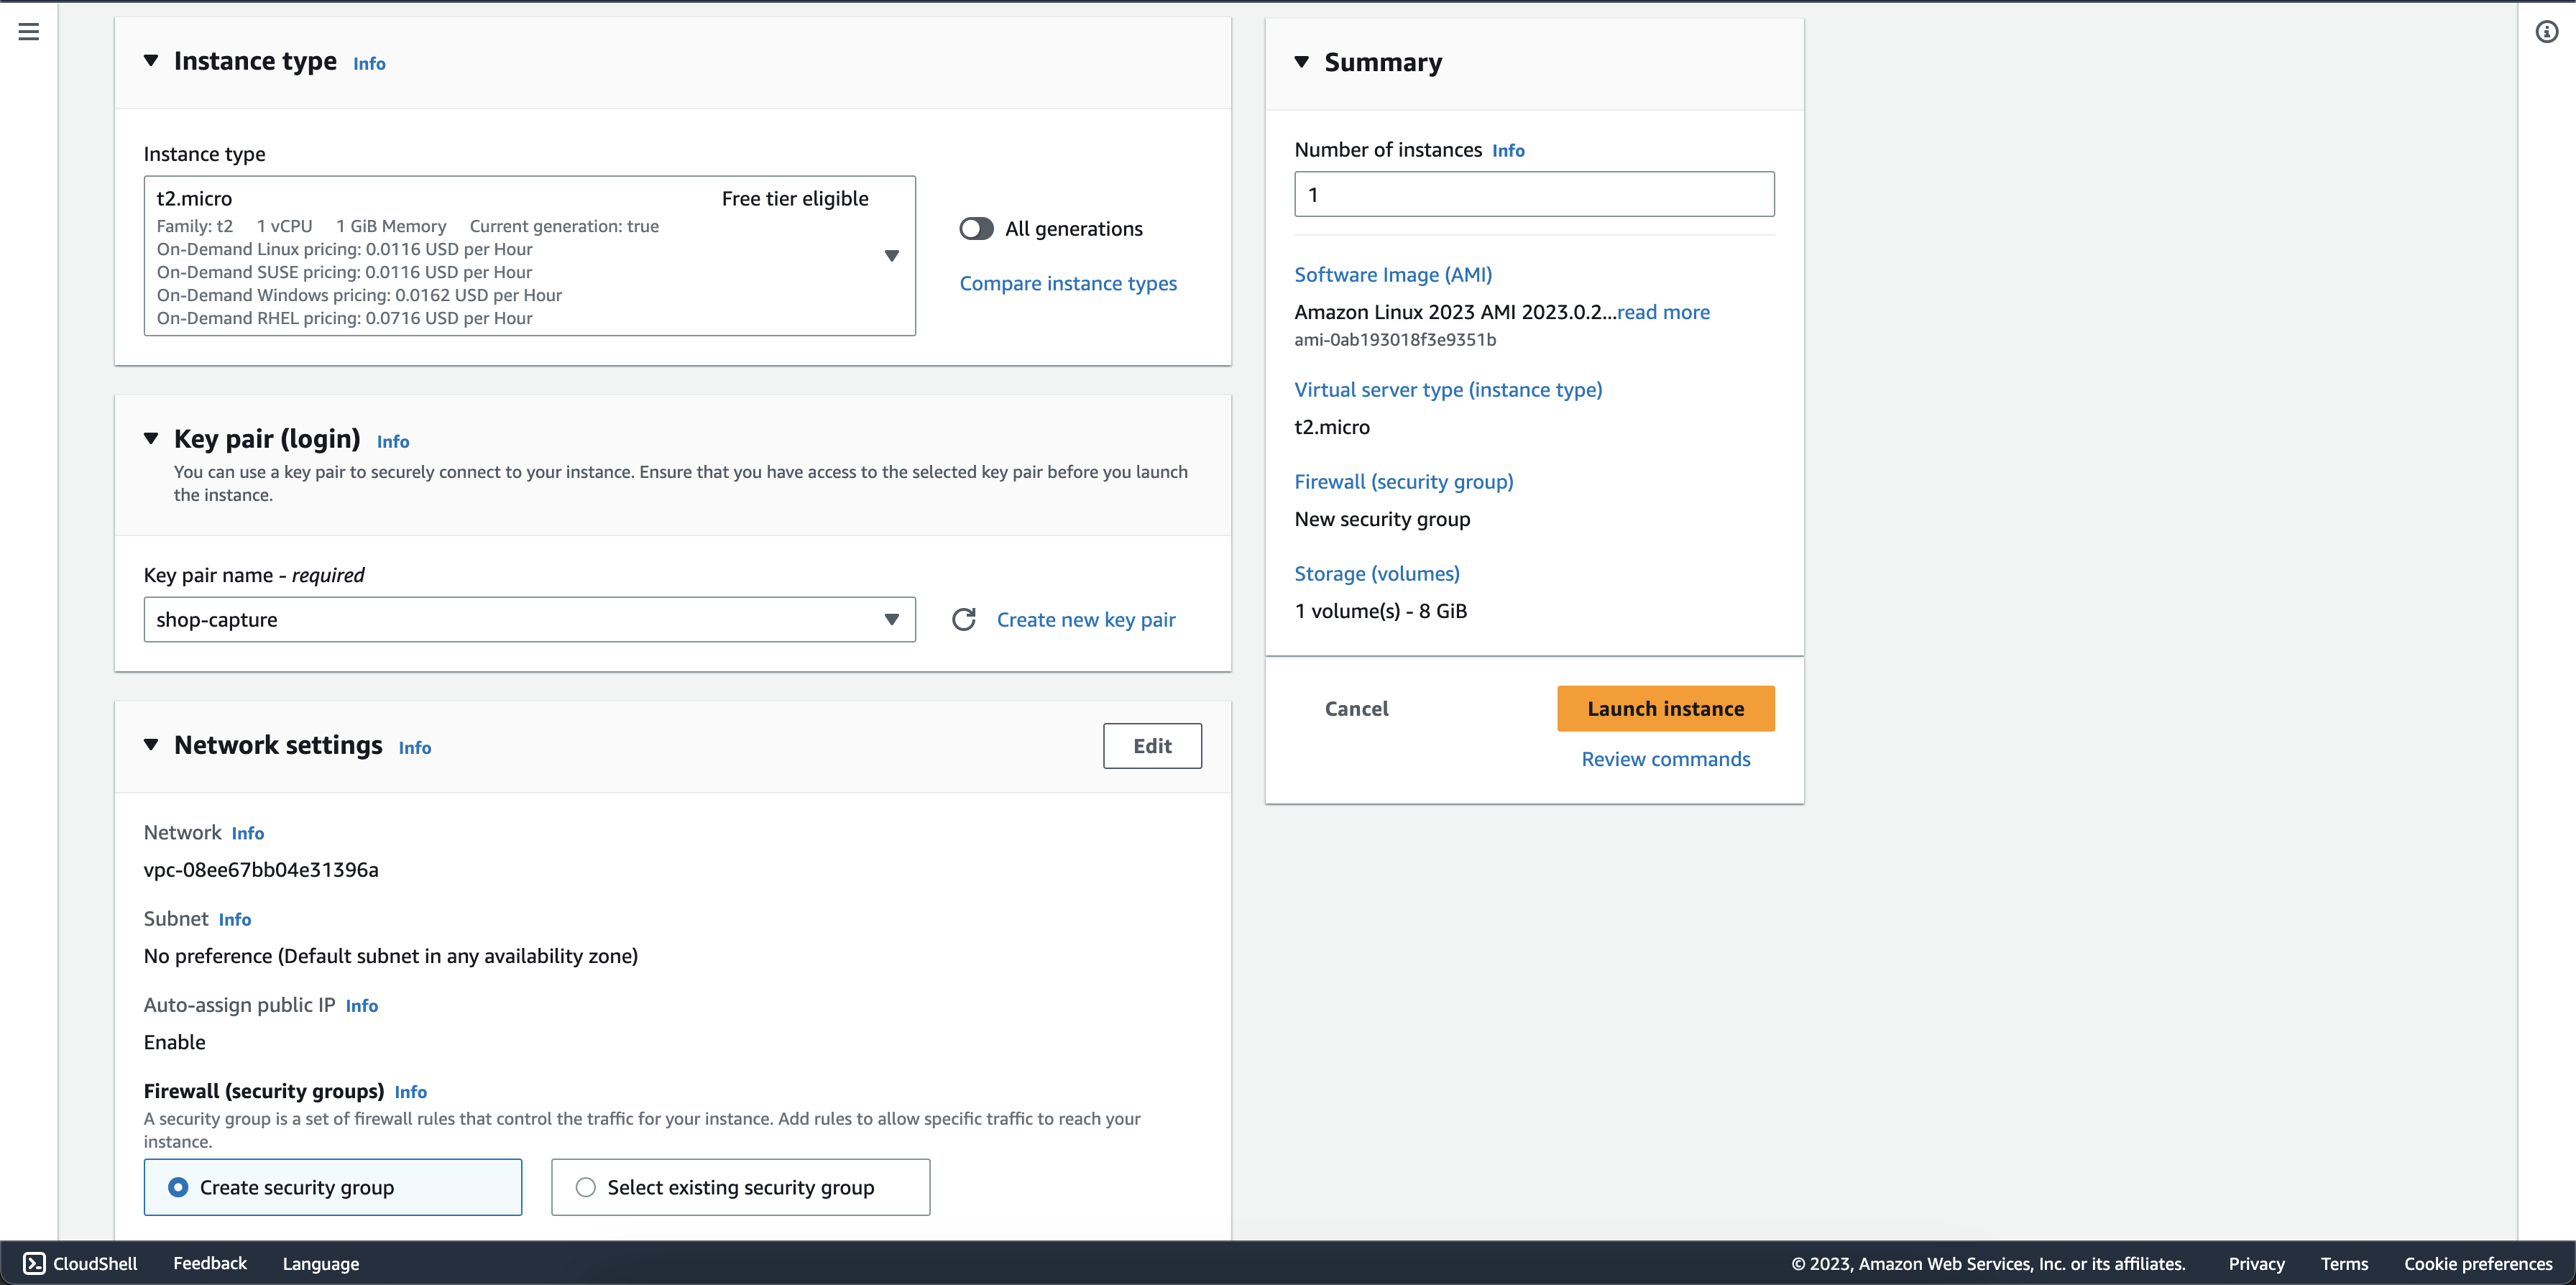
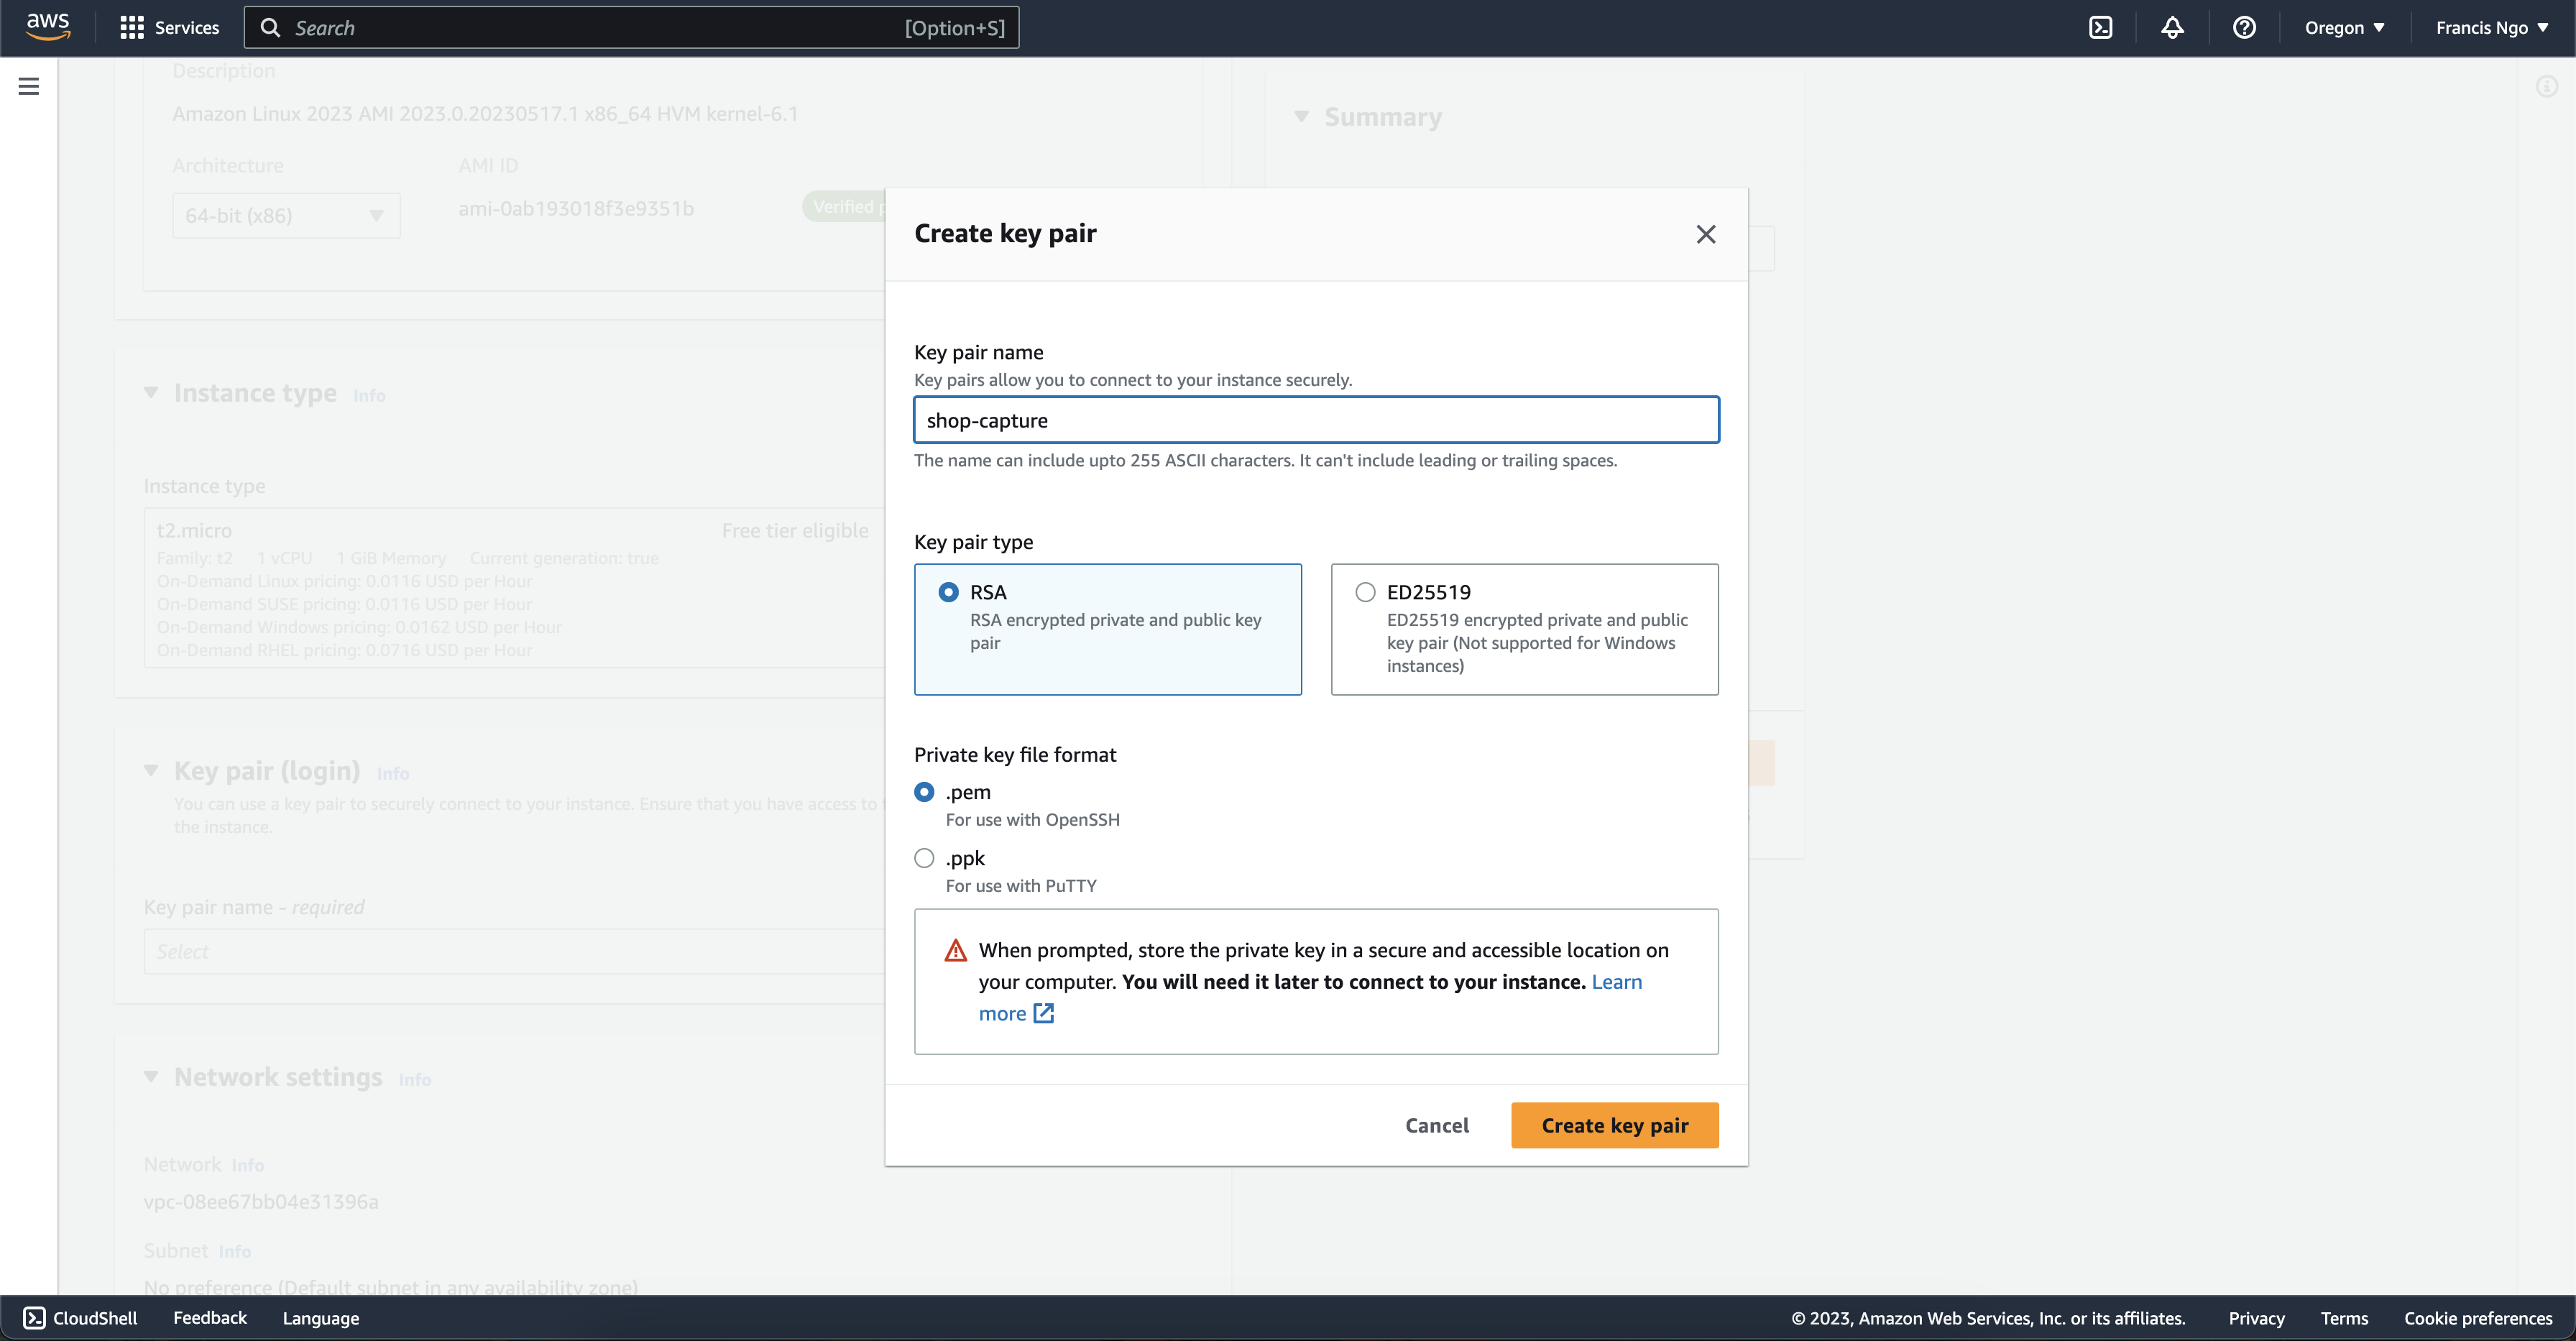
We must create a new key pair name. Select RSA for key pair type and .pem for private key file format. We will need this pem file later to connect our instance to our application.
After we create, we need to set our network settings. Under Network Settings, select Edit to expand the tab.
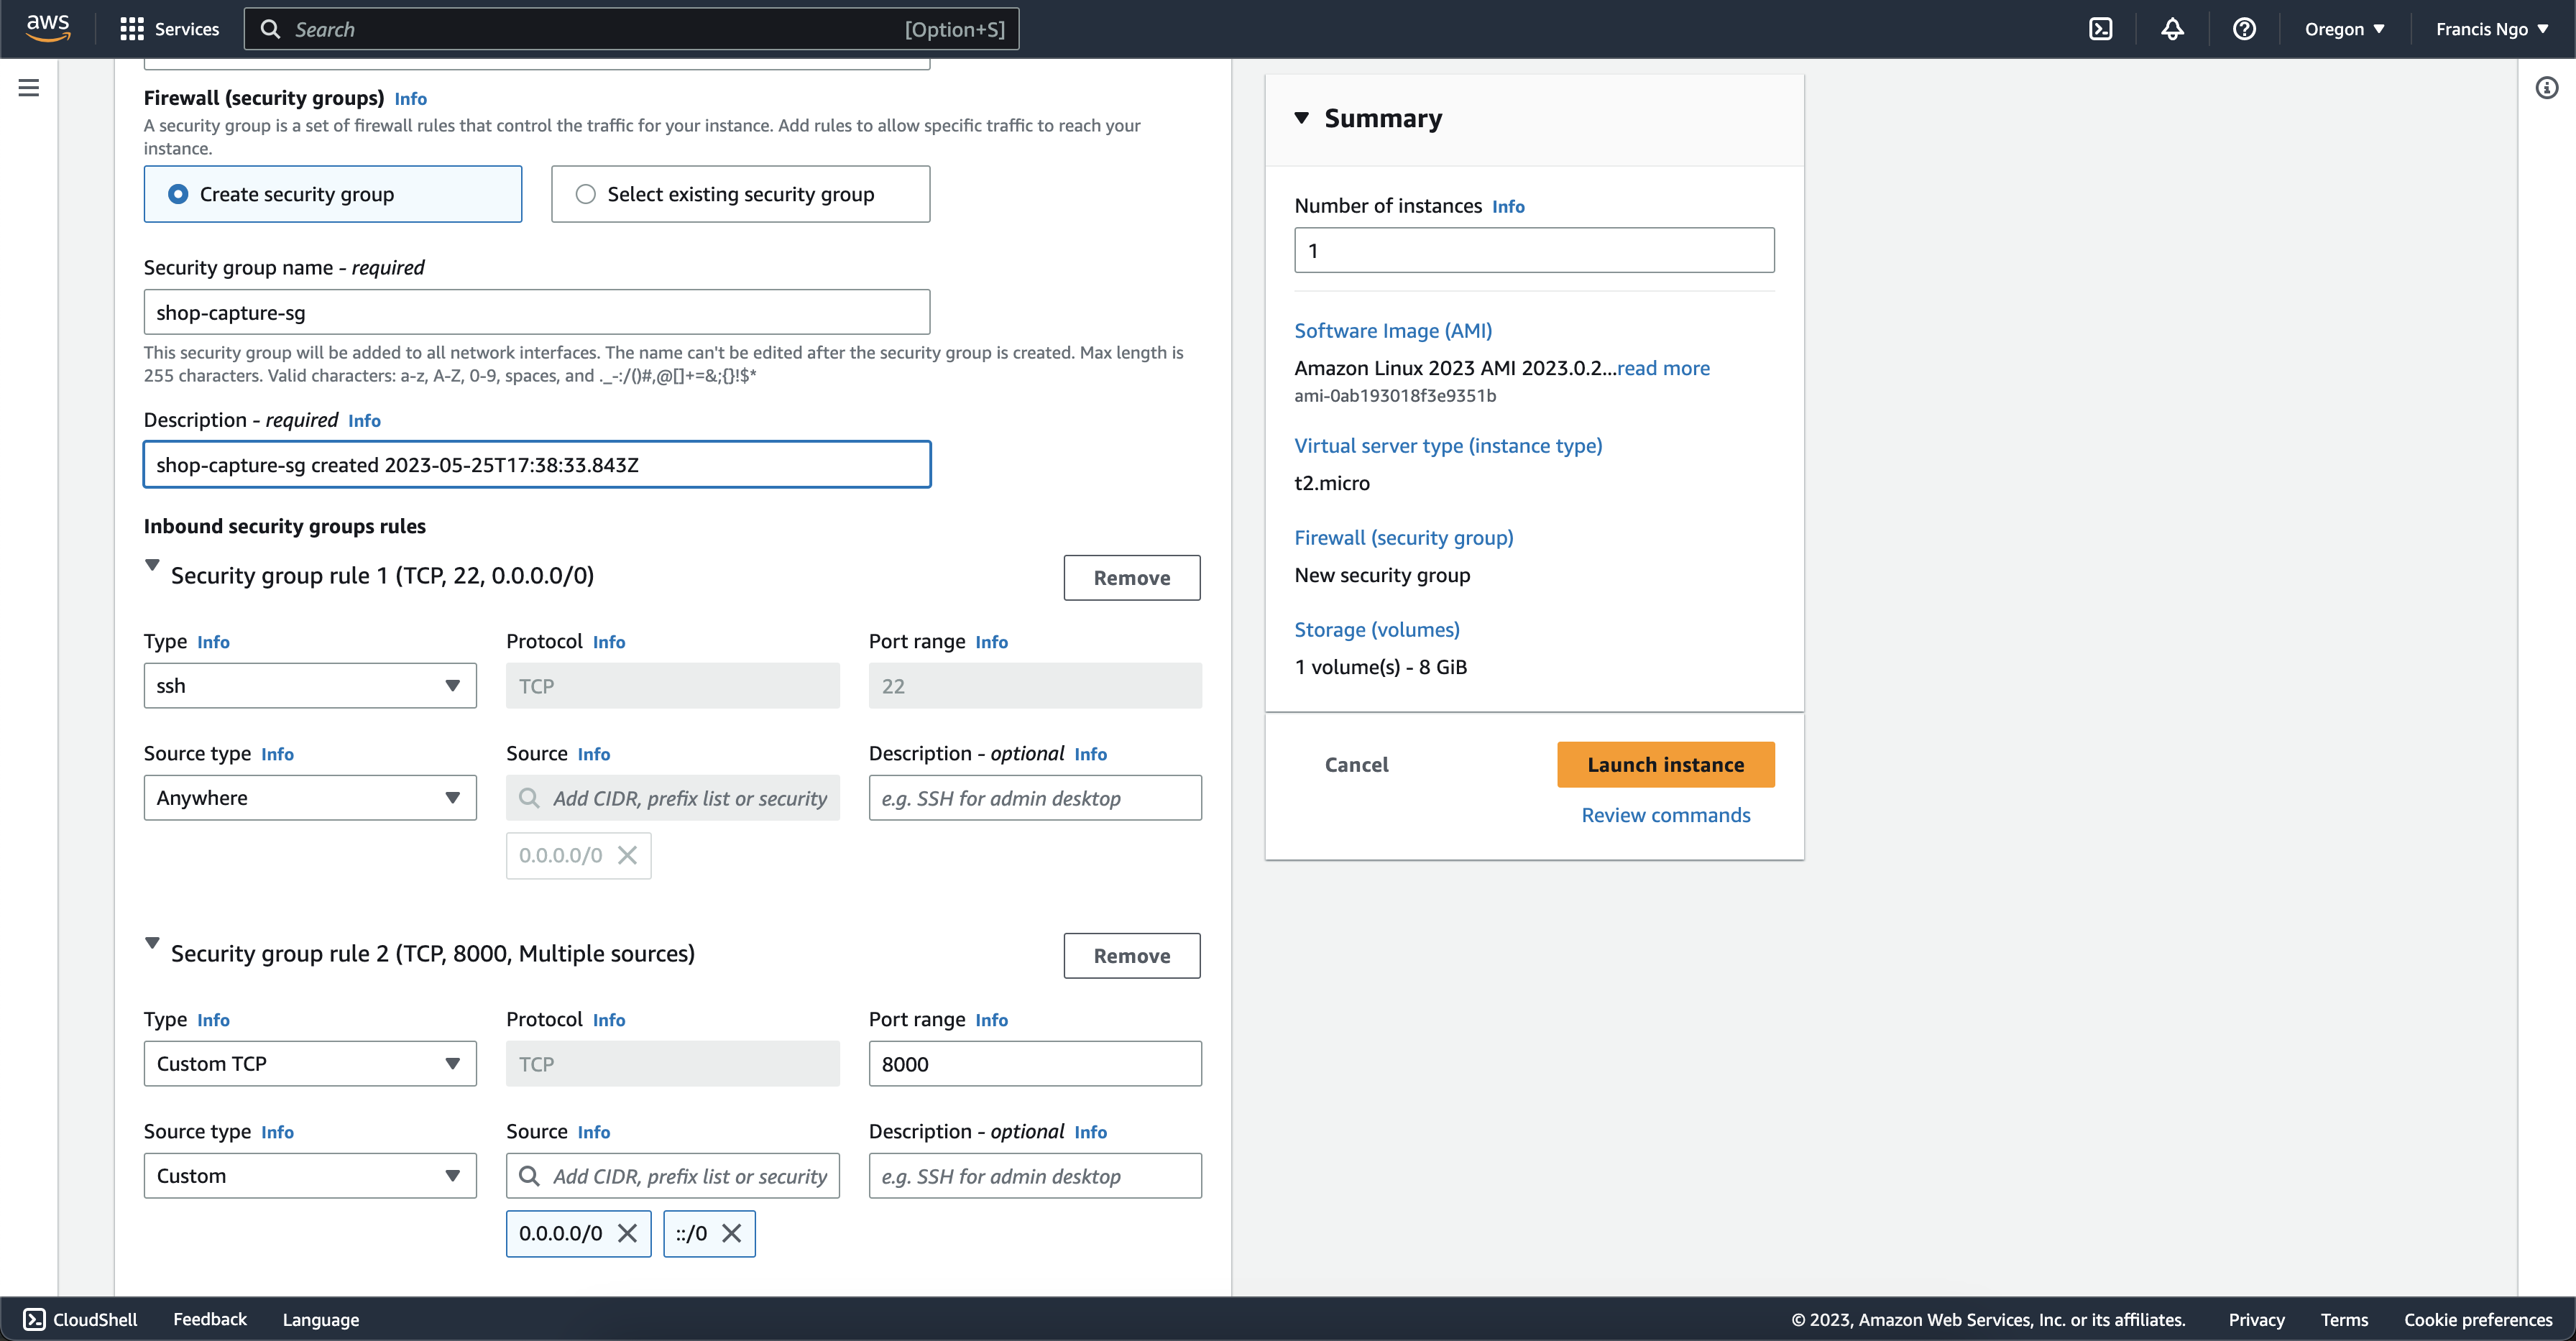
Select Create security group, provide a security group name and description, and under Inbound security group rules, we want to set up two security group rules:
Security group rule 1
- Type: ssh
- Protocol: TCP
- Source Type: Anywhere
- Port Range: 22
- Source: 0.0.0.0/0
Security group rule 2
- Type: Custom TCP
- Protocol: TCP
- Source Type: Anywhere
- Port Range: 8080
- Source: 0.0.0.0/0, ::/0
After all the setting, select “Launch Instance” And you should see it running on the Instances dashboard (may take a few minutes).
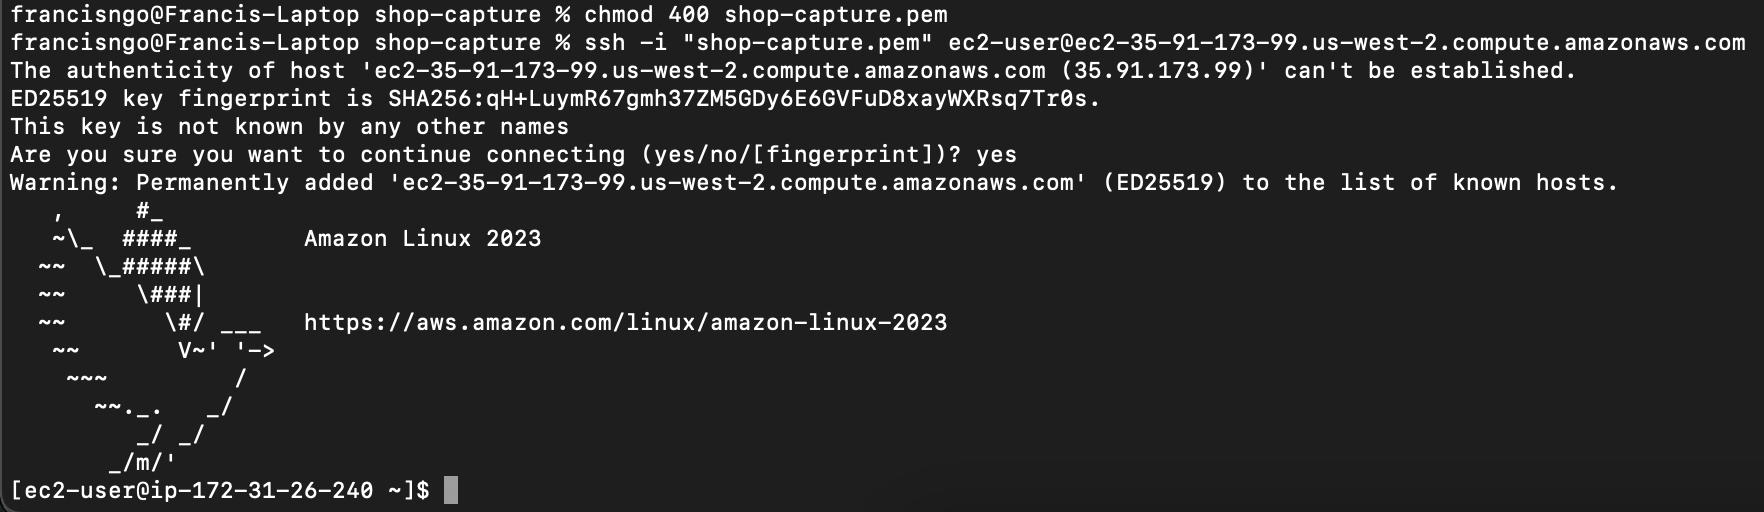
The next step is to connect our instance. The instructions are under the Connect tab on the Instances dashboard. Select the instance we just created and click Connect to connect our instance to our application via SSH on our shell terminal.
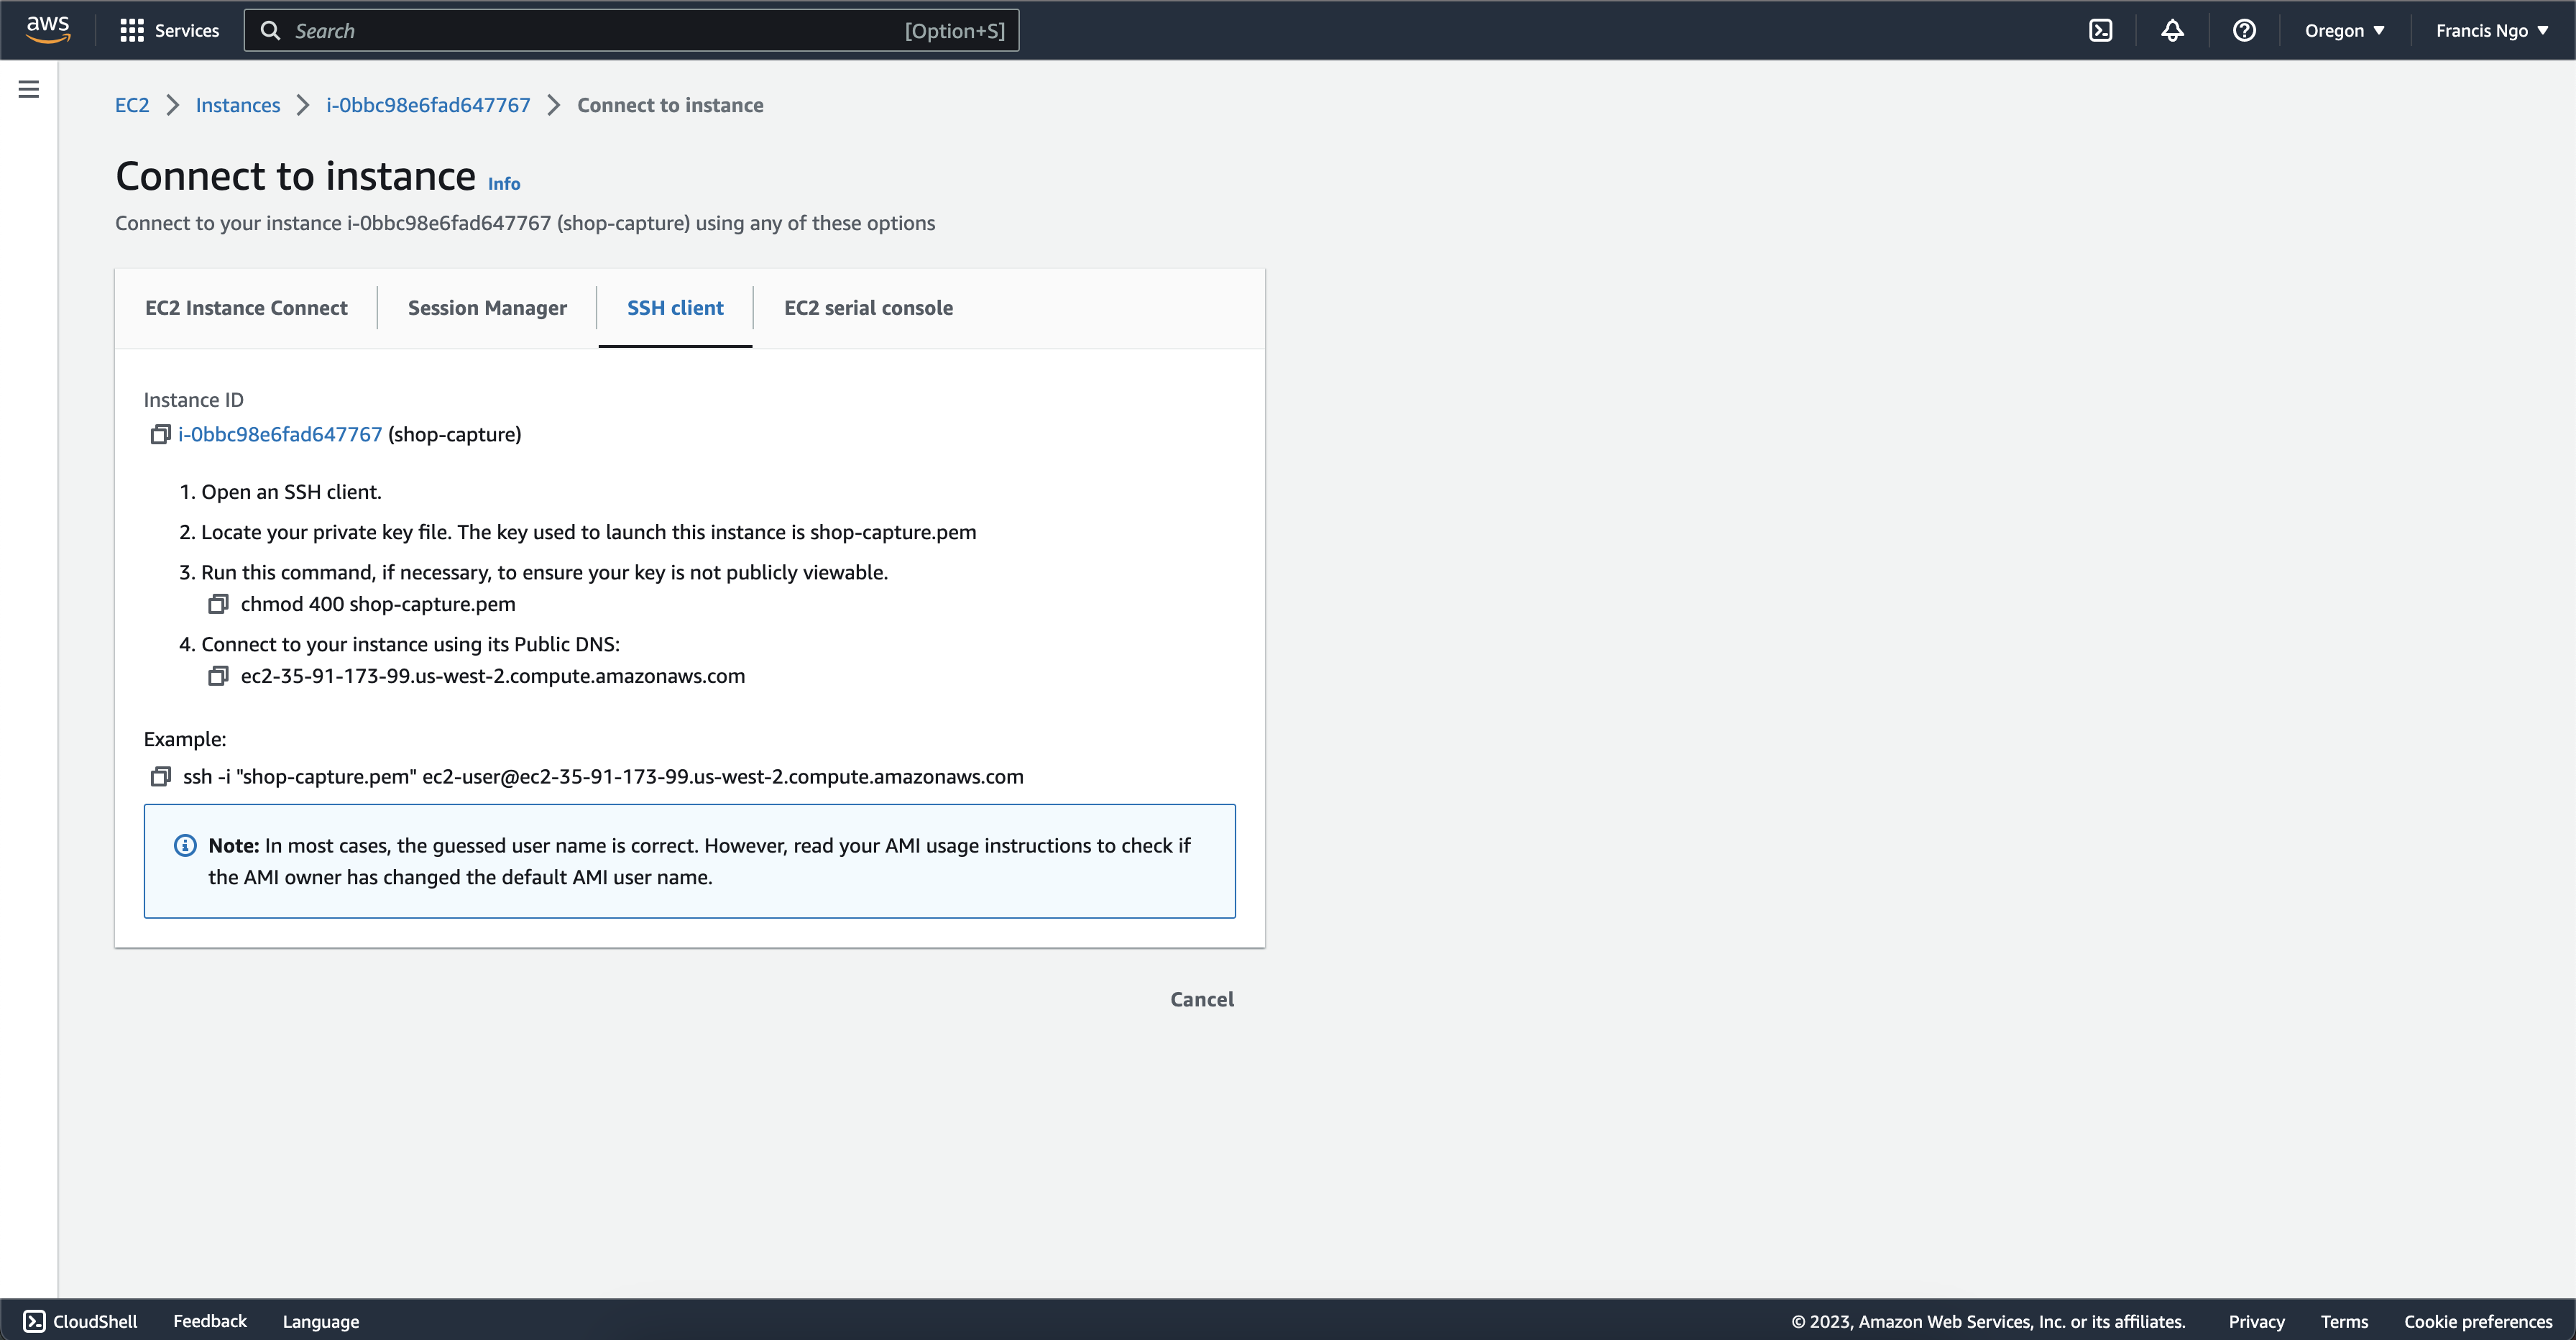
If everything went smoothly, we should be connected our instance and be able to run Linux commands in our shell terminal.
In the Amazon Linux run these commands:
Update existing packages that are installed on EC2 instance with latest versions with latest security updates:
yum update -y
Install Docker:
yum install docker
To give adminstrative privileges to use Docker (the user should be something like ec2-user)
sudo usermod -a -G docker <user>
Once we have docker installed, we now need to start Docker inside our instance:
sudo service docker start
Now, we should be ready to deploy our containers to our Amazon EC2 instance. In our Linux terminal, make sure to login into our Docker (credentials should be the same username and password as the Docker Hub account)
docker login
From inside the docker linux shell, we want to pull both Docker images from our Docker Hub:
docker pull francisngo/shop-capture-client
docker pull francisngo/shop-capture-server
Lastly, run the docker containers:
docker run -d -p 3000:3000 francisngo/shop-capture-client
docker run -d -p 4000:4000 francisngo/shop-capture-server
To verify the running containers:
docker ps
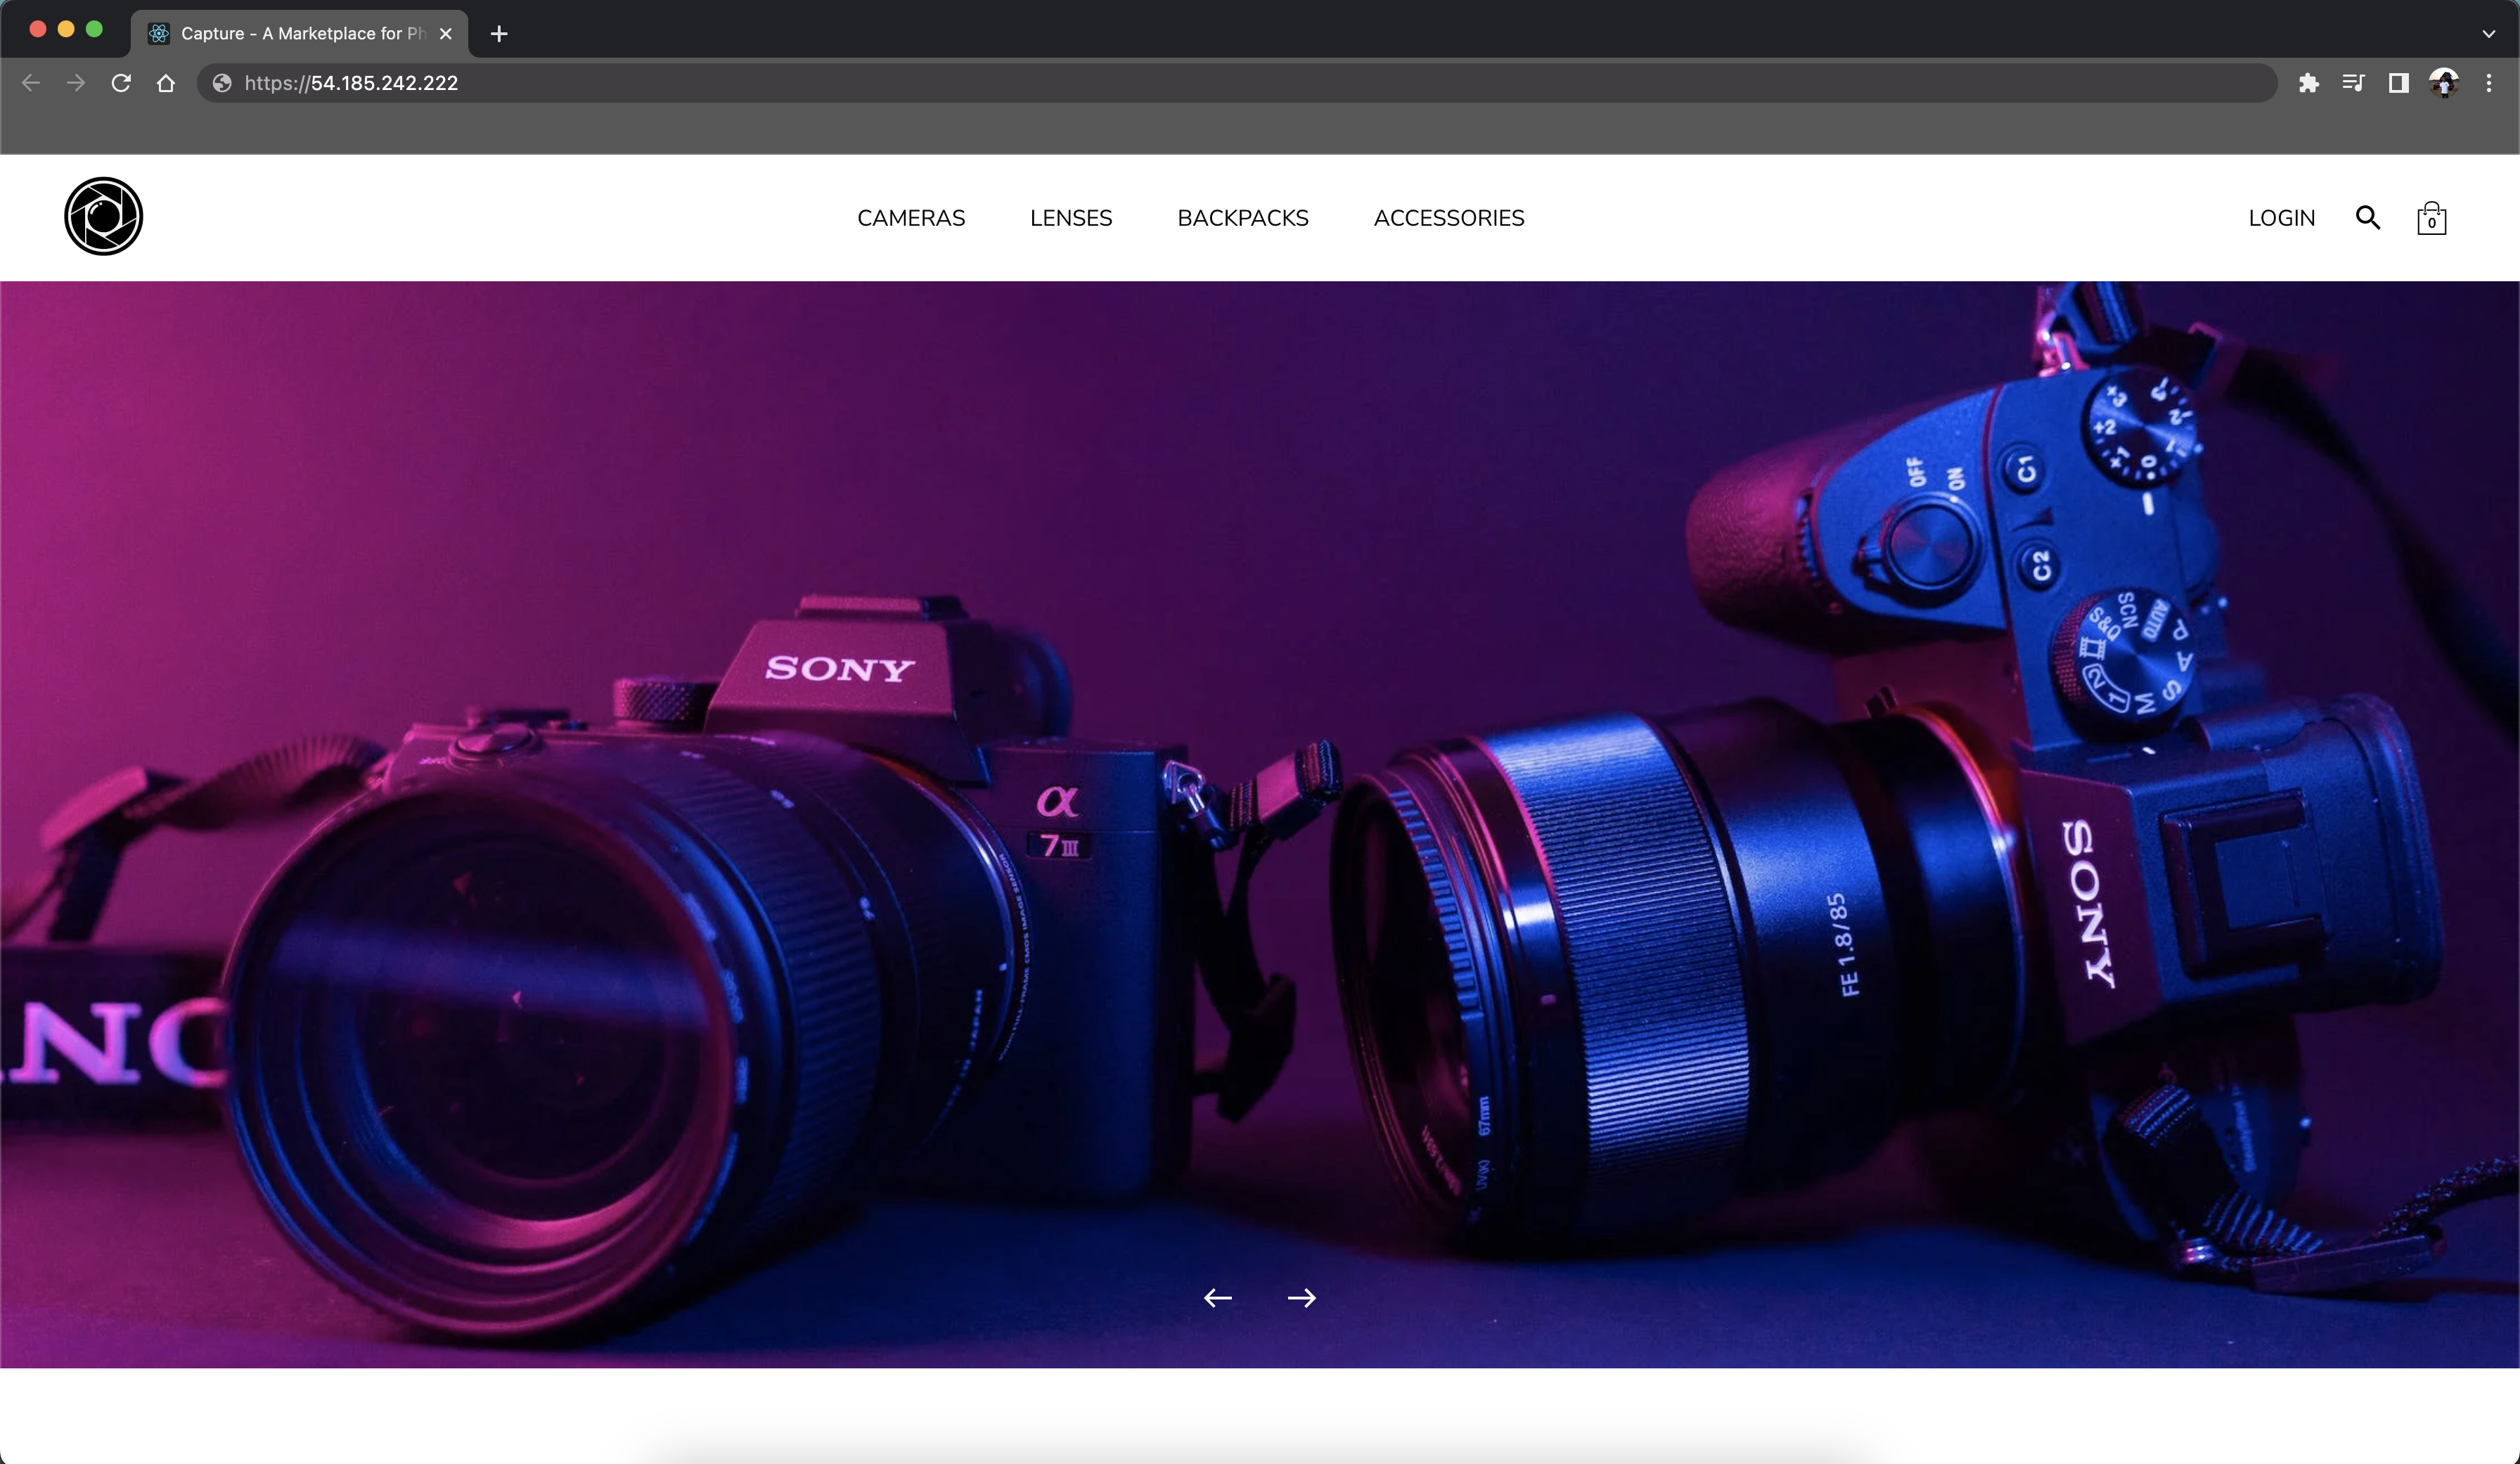
From here, we can head back to our EC2 Instances Dashboard on AWS, select our instance and click open address under Public IPv4 address.
Summary
Over, in this article, we learned about the process of containerizing and deploying our full-stack web application.
Containerize
After completing the development of the application, we created Dockerfiles to containerize the front-end and back-end and use docker-compose to aggregate and push both containers to Docker Desktop to be run on our local computer under one network.
Deploy
We deployed our application using AWS EC2. On our EC2 instance, we opned up port 80 for inbound traffic, installed and updated the necessary software, cloned the repository and ran docker-compose up -d to run the application.